13 Gorgeous Half Up Half Down Curly Hairstyles for Every Occasion
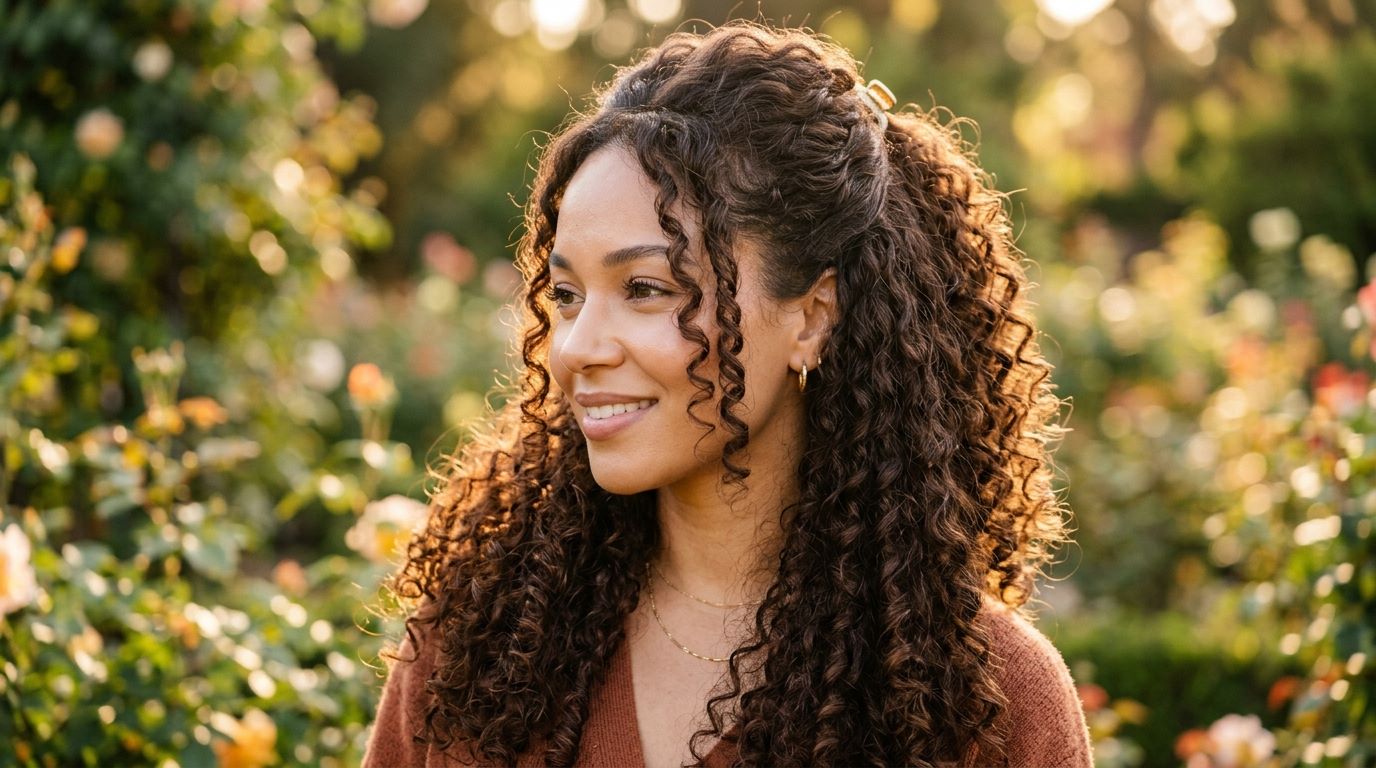
Curly hair has a personality all its own and half up half down styles are one of the best ways to show it off. This look keeps your curls front and center while giving you a pulled-together feel that works for a dinner date, a beach day, or a big presentation. The beauty of it is how forgiving it is. You don’t need a salon appointment or a bag full of products.
A few bobby pins, maybe a clip or a scrunchie, and you’re working with what your curls already want to do. Whether your hair is loosely wavy, tightly coiled, or somewhere in the middle, there’s a half up style here that fits your texture, your schedule, and your budget. Read through all 25 looks below and find the ones that speak to you.
The Classic Puff Half Up
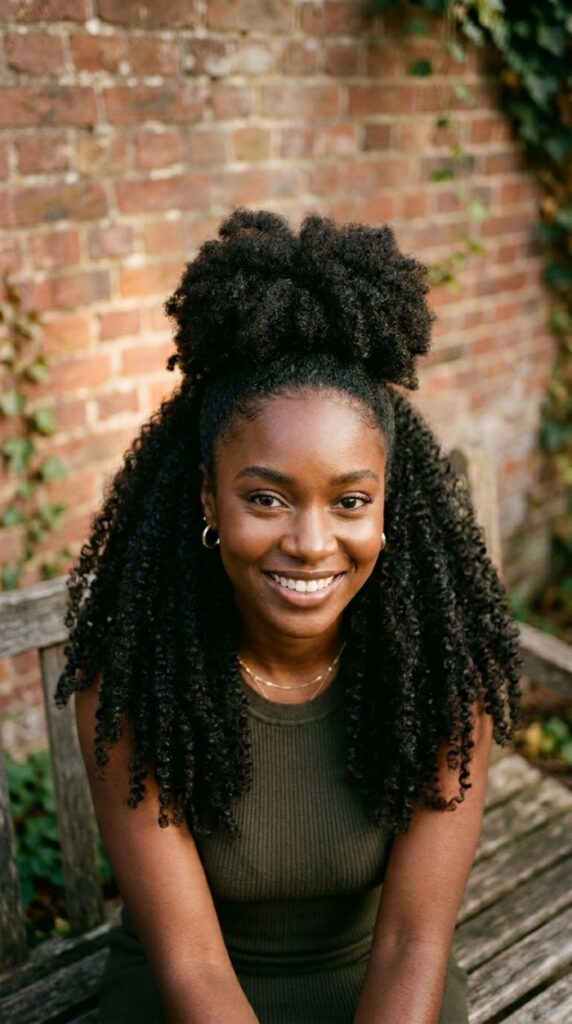
The classic puff half up is one of the easiest styles you can pull off on natural hair. It works especially well on 4A through 4C textures where volume is already built in. Start by parting your hair horizontally from ear to ear. Gather the top section and secure it with a soft elastic band or a large scrunchie. Fluff the puff with your fingers to get it as round and full as you like. The curls in the back and sides hang free, which means this takes less than five minutes once your hair is already detangled.
Use a satin-covered elastic to avoid breakage at the root. If the puff looks a little flat, try lightly misting the roots with water and lifting with a wide-tooth comb before securing. This style holds up all day without touching it again. It’s a go-to for running errands, working from home, or going out casually. Budget tip: a two-pack of satin scrunchies from a drugstore costs around $3 and does the job perfectly.
Twisted Crown Half Up
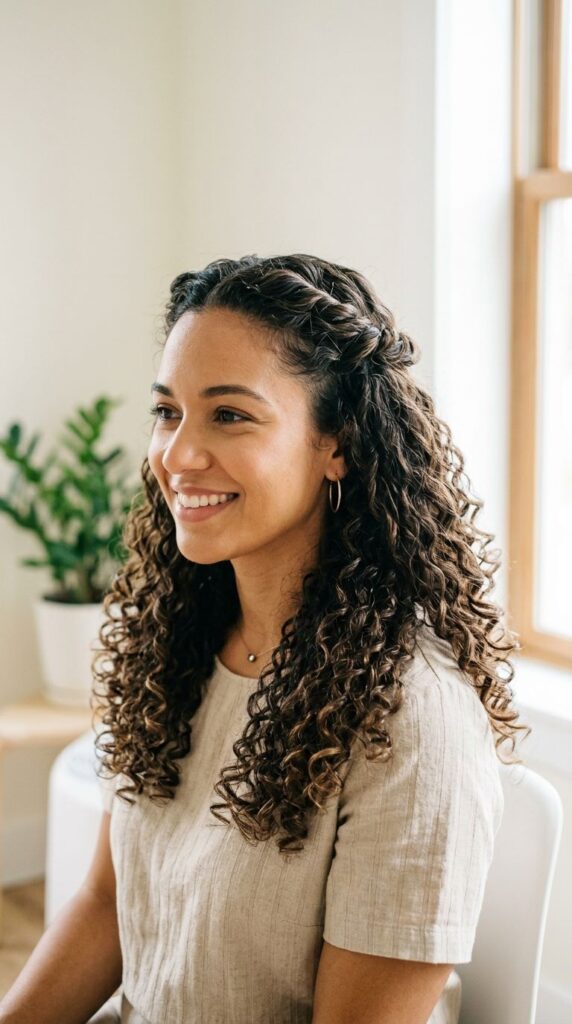
A twisted crown adds a romantic, put-together quality to any curly half up look. Take a small section from each side of your hairline — roughly an inch wide — and twist each one back toward the center of your head. Secure both twists together at the crown with a bobby pin or a small jaw clip. The rest of your curls hang down naturally. This style frames the face beautifully and works on almost any curl pattern from 2C to 4A. It gives you the look of more effort than you actually put in, which is always a win.
Twist in the direction of your natural curl so the twist blends right in instead of fighting your texture. If your curls are longer and heavier, use two or three bobby pins to make sure the twist stays in place throughout the day. You can dress this up with a pearl or metallic pin for an event, or keep it casual with a simple clip. It takes about three minutes once you get the motion down. No products required — just your fingers.
Scrunchie Top Knot Half Up
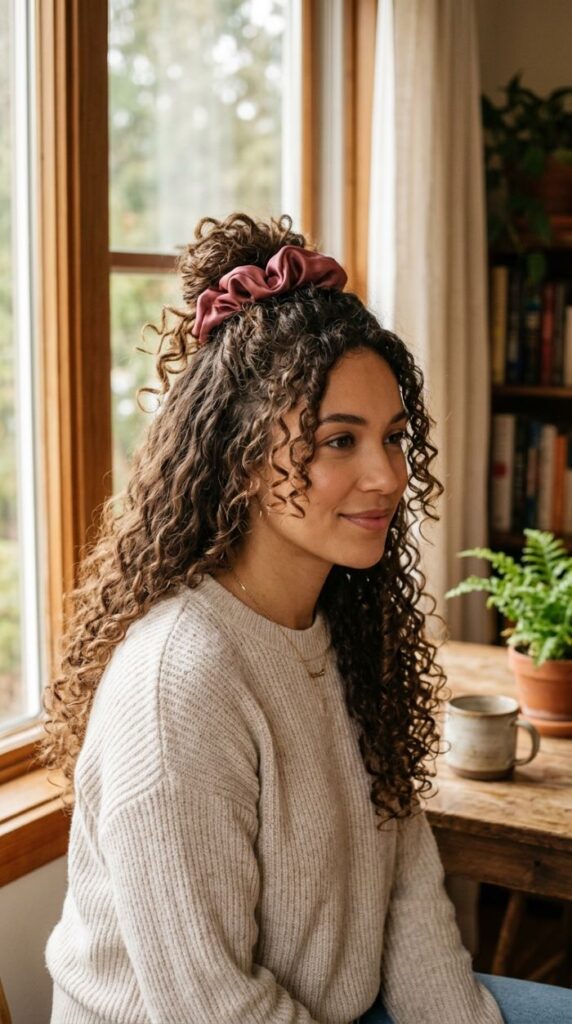
The scrunchie top knot is the definition of effortless. Pull the top half of your curls up, twist them loosely, and loop a scrunchie around twice — or three times if your hair is finer. Let a few pieces fall out of the bun on purpose. That messy quality is exactly what makes this look work. It reads as intentional rather than rushed. Silk or satin scrunchies are the gold standard here because they don’t crease curls or cause frizz the way regular elastics do. You can find them at most beauty supply stores for a couple of dollars.
This style is ideal for second-day curls when your hair still has definition but you don’t want to re-style from scratch. The top knot keeps the front of your hair out of your face while the bottom curls stay free and visible. It works for grocery runs, casual office days, zoom calls, or a relaxed dinner out. Add a few face-framing curls by pulling them out gently around your temples once the scrunchie is in.
Half Up Space Buns
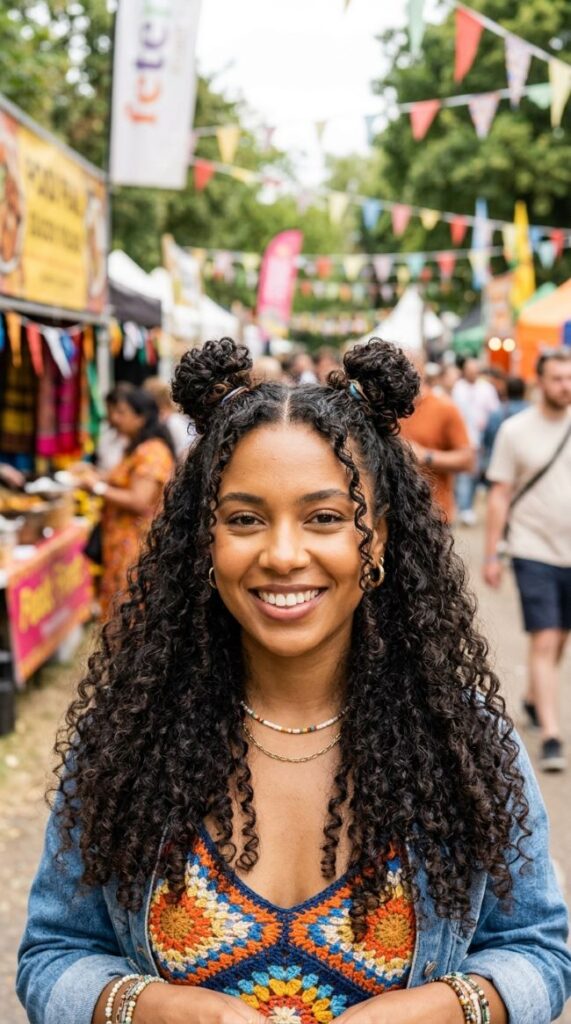
Space buns on curly hair look different from the typical straight-hair version — in the best way possible. Because curly hair has natural volume and texture, the buns come out rounder, fuller, and more dimensional. Part your hair down the middle at the top, then gather each top section and twist it up into a small bun, securing each one with an elastic and reinforcing with bobby pins. Let the bottom section of curls fall loose. The buns don’t need to be perfect.
A few curls escaping from each bun add to the charm. This look works great for outdoor events, concerts, festivals, or any occasion where you want your style to match a fun mood. It also keeps your hair out of your face on a hot or humid day, which is a practical bonus. For a polished twist, use matching scrunchies or ribbon instead of plain elastics. If your buns feel too small, gently loosen each one by pulling the bun apart slightly after securing it. This creates instant volume without needing more hair to work with.
Pin-Up Curl Half Up
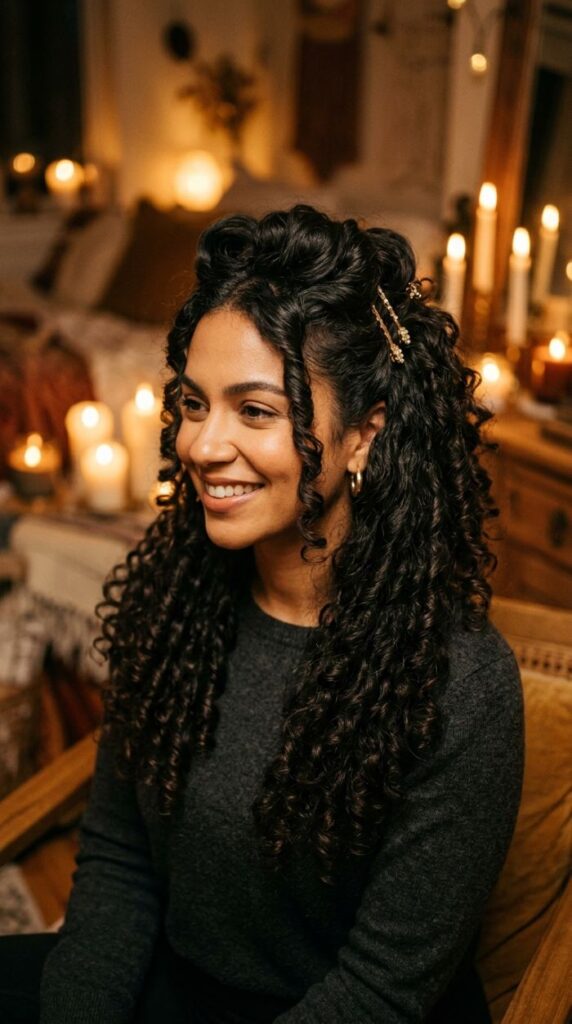
The pin-up curl half up is a nod to old Hollywood glamour but works on modern curly hair without needing a ton of styling tools. Take the top section of your curls, roll them loosely inward, and pin the roll flat to your head with two or three decorative bobby pins arranged in a fan or cross pattern. Let the rest of your curls hang freely. Decorative pins are the key detail here. You can find rhinestone, pearl, or gold-toned bobby pins at most beauty supply stores for under $5 for a pack.
They make the style look intentional and finished. This works best on 3A to 3C curls that have some length and definition. If your curls are very tight and short, this style may work better with a little light-hold gel applied to the top section beforehand to keep the rolled section smooth. Wear it to a wedding, a dinner party, or any occasion where you want your hair to feel special without a full updo. The whole thing can be done in about five minutes.
Braided Half Up Crown
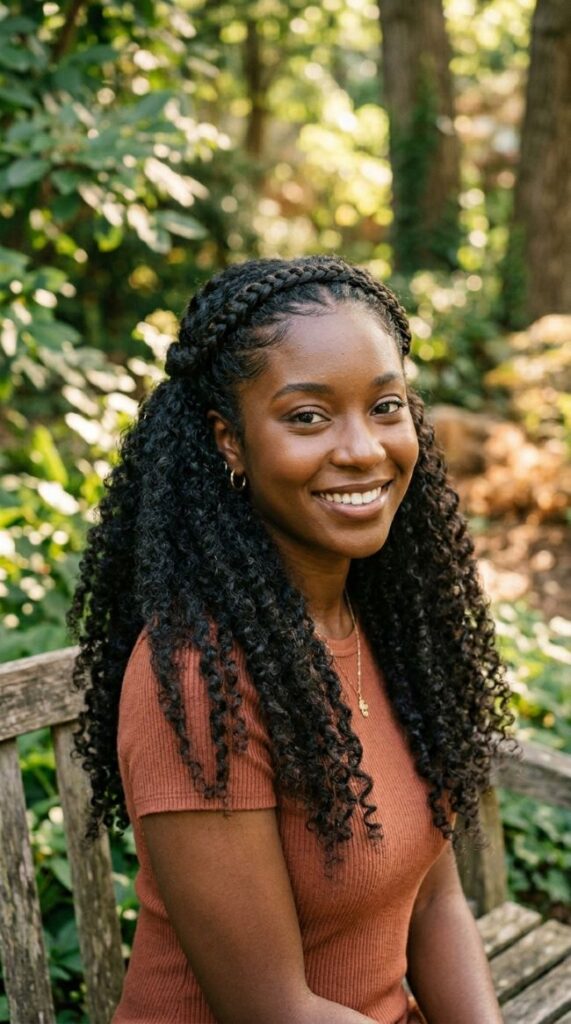
A braided crown on curly hair gives the look of a flower crown without needing a single accessory. Take a one-inch section of hair from your left temple area and braid it — a simple three-strand braid works perfectly — then sweep it across the top of your head and pin it at the right side. Repeat on the other side if you want a fuller look. The remaining curls fall loose underneath. Keep the braid relaxed and loose so it sits flat against your head and doesn’t look too tight.
A tight braid on curly hair can look stiff and at odds with the free curls below it. This style frames the face like a headband while also keeping your hairline curls tamed on a humid day. It’s a good option when you want a little extra structure but don’t want a full updo. Works well for outdoor weddings, garden parties, or spring and summer events where you want something that feels botanical and natural. No products needed beyond what you already use for your curl routine.
Half Up with a Claw Clip
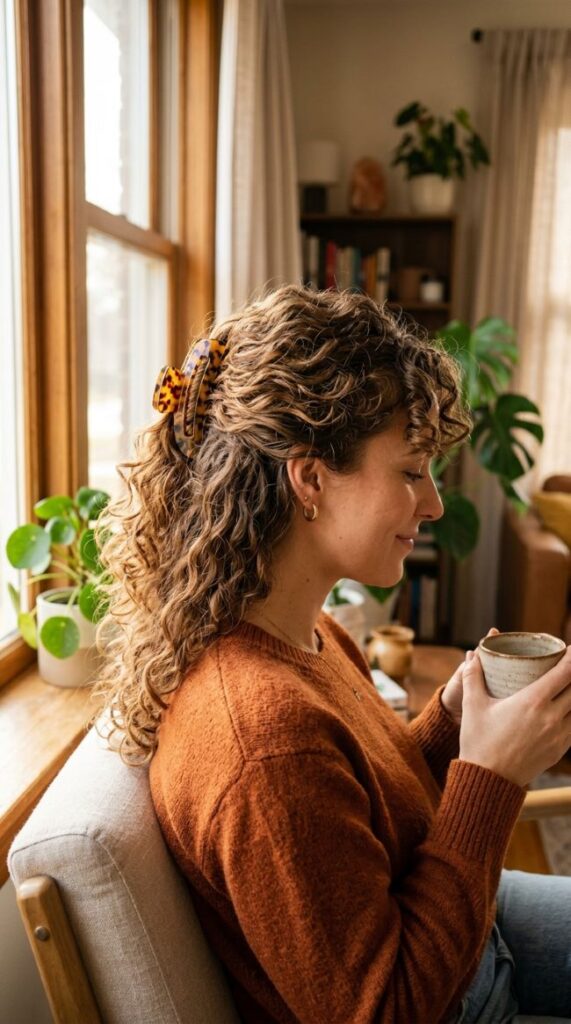
The claw clip half up is probably the fastest style on this list. Gather the top half of your curls, twist them loosely two or three times, and clip them at the crown or back of your head. That’s it. The claw clip does all the work. Larger clips work better for curly hair because they can hold more volume without squishing your curls flat. Look for clips that are at least 3 inches wide. Tortoiseshell, clear acrylic, and matte black are all popular right now and easy to find at pharmacies and dollar stores.
This style is a great everyday option — it works for commuting, working at a desk, running errands, or going to a casual lunch. It’s especially useful when your second or third-day curls have lost some of their definition at the top but still look good in the back. The clip hides the flatter roots while letting the better-defined curls show at the bottom. No products, no heat, no hassle. Swap the clip color to match your outfit and you’ve got an instantly pulled-together look.
Curly Half Up with Bangs
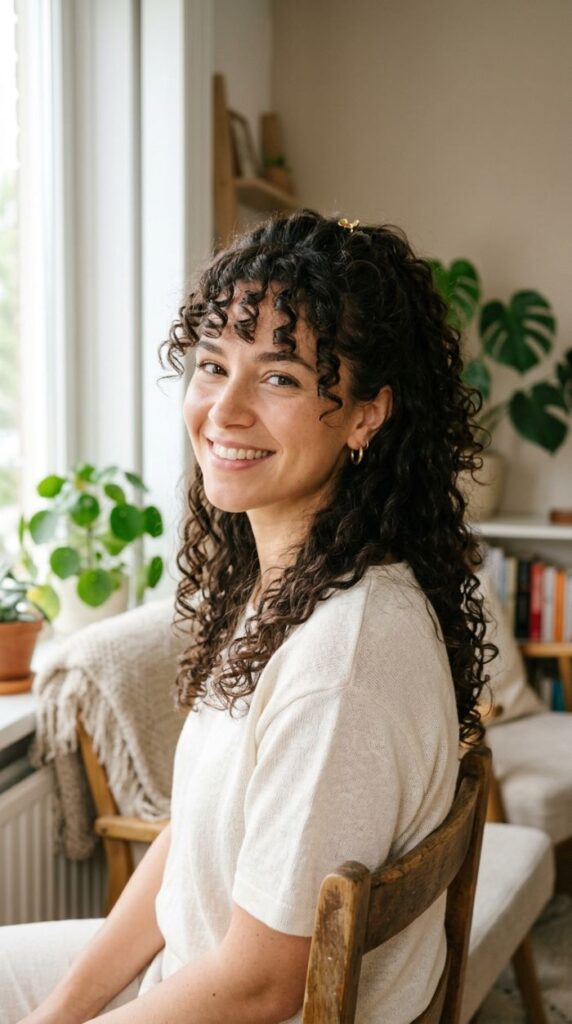
If you have curly bangs — or curls that fall forward naturally around your forehead — this style works with that instead of fighting it. Pull the top section of your curls back and secure it loosely. Let the front curls around your face fall forward, including any that land across your forehead. Don’t pin the face-framing pieces back. That’s the whole point of the style. The contrast between the pulled-back top and the free curls framing your face gives the look dimension and softness.
This style works well for round and heart-shaped faces because the curls at the front add vertical lines and draw the eye. It’s also practical because it keeps the bulk of your curls off your neck while leaving a little texture visible near your face. If your curls tend to get frizzy in the front, apply a small amount of curl cream or gel to those pieces after you’ve secured the back. This helps define the front curls without making them stiff or crunchy. Works for almost any occasion.
The Low Half Up Pony
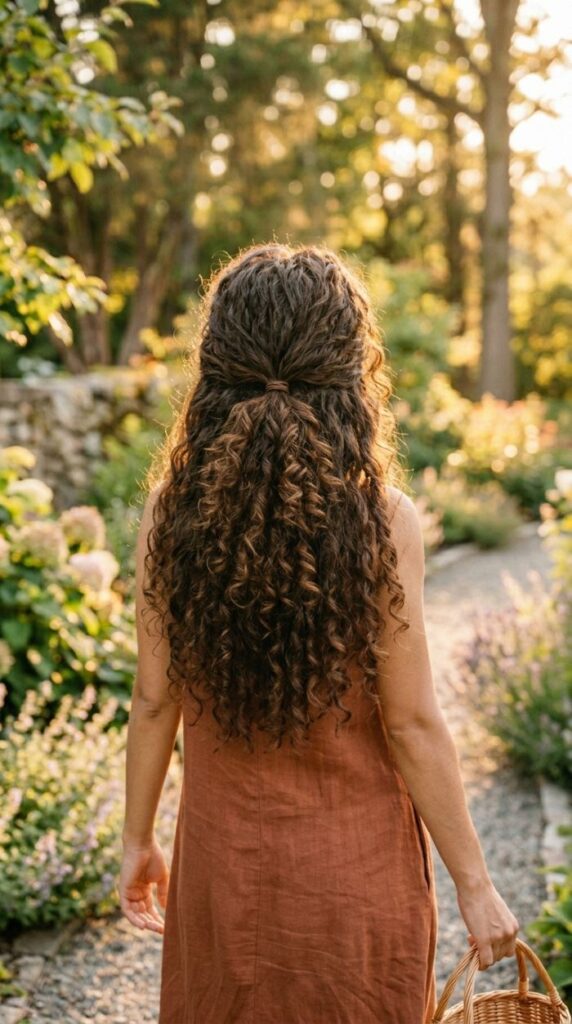
The low half up pony sits right at the nape of your neck and gives a sleek, elongated look without needing a brush or a lot of effort. Gather the top and side sections of your hair, smoothing them back as much or as little as you like, and secure them with an elastic at the base of your neck. The curls from this ponytail blend naturally with the curls hanging free below it, so the line between the two sections almost disappears. This works especially well on longer curly hair where the lengths are similar in texture throughout.
The low placement is also less tension on your scalp than a high pony, which matters if you wear your hair up frequently. Wrap a small curl around the base of the elastic to hide it and secure with a pin — this detail takes ten seconds and makes the style look intentional. Wear it to the office, to church, to a more formal dinner, or anywhere you want something that reads neat and put-together. Budget tip: use a spiral hair coil instead of an elastic to avoid dents in your curls.
Flower Clip Half Up
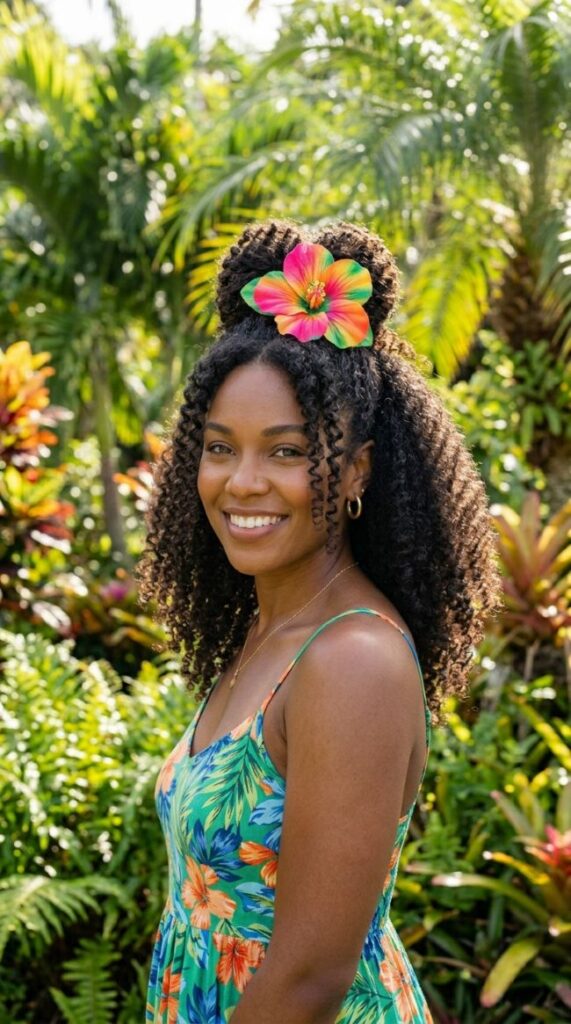
A flower clip transforms the simplest half up style into something that looks completely intentional and dressed up. Pull your top curls back, secure them however you like — a pin, an elastic, or just a clip — and then cover the base with a fabric or dried flower clip. The clip does all the decorative work. You don’t need a perfect twist or a neat bun underneath it because the flower covers everything. This is a lifesaver on days when your curls are cooperating in the back but the roots look flat or messy at the top.
Find fabric flower clips at craft stores, hair accessory shops, or online for usually under $5. They come in every color, so you can match them to an outfit or go bold with a contrasting shade. Great for spring and summer occasions, outdoor weddings, brunches, or any event where you want your hair to feel celebratory. Mix two smaller flower clips for a different effect — place one on each side of the half up section for a symmetrical look that takes maybe two minutes to put together.
Half Up with a Ribbon Tie
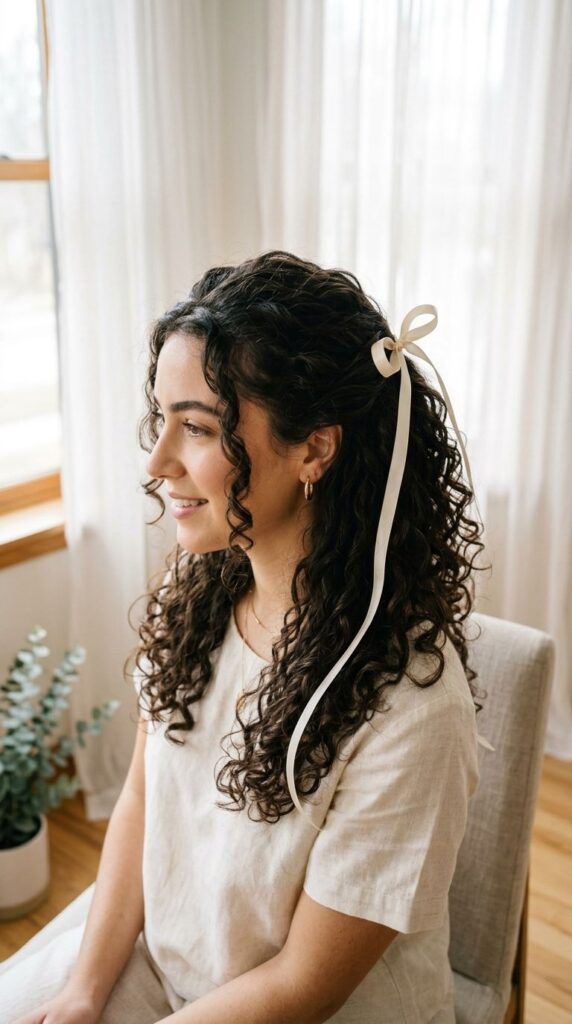
A ribbon tied around your half up section is one of the most affordable ways to make your hair look put together and polished. Pull the top section of your curls back and instead of using an elastic or clip, wrap a thin satin or grosgrain ribbon around the gathered hair twice and tie it in a bow. Satin ribbons cause less friction on curly hair and won’t leave a crease the way a rubber band would. You can buy a spool of ribbon from a craft store for a couple of dollars and cut it to whatever length works for your hair.
Leave the ribbon tails long so they fall down with your curls — this makes the whole style look intentional and whimsical. This look works beautifully for garden parties, engagement photos, baby showers, or any occasion with a soft, romantic tone. Try a white or ivory ribbon for a bridal feel, a rich red or burgundy for something with more drama, or match the ribbon to whatever color you’re wearing. Change the ribbon and you have a completely different look every time.
High Curly Half Up Puff
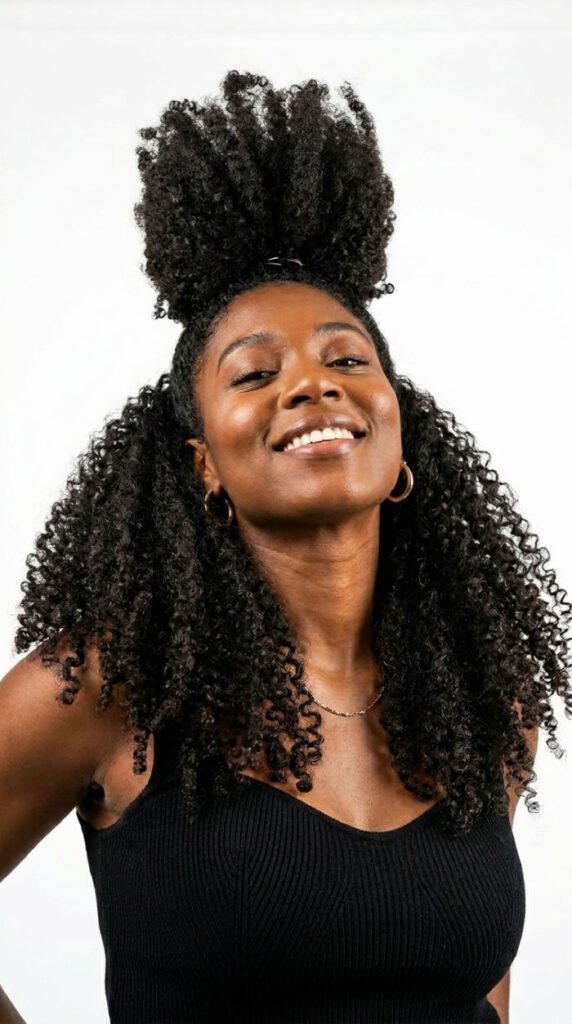
The high half up puff is the same idea as the classic puff but placed higher on the head for more drama and more height. Gather the top section of your hair and secure it at the very crown — almost at the top of your head. Fluff and expand the puff as much as you can with your fingers. The higher placement draws the eye upward and creates the illusion of more height.
This is a great style for petite frames because the added height balances your proportions. It also shows off the full length and volume of your curls in the back since the top is raised. Use a soft elastic or a satin scrunchie to protect the hair at the base of the puff. If your curls at the puff need more definition, mist them lightly with water and re-scrunch before gathering. This look works for both casual and semi-formal occasions. It photographs beautifully because of the shape and silhouette it creates. Pair it with bold earrings for an instantly polished feel.
Curly Half Up with Headband
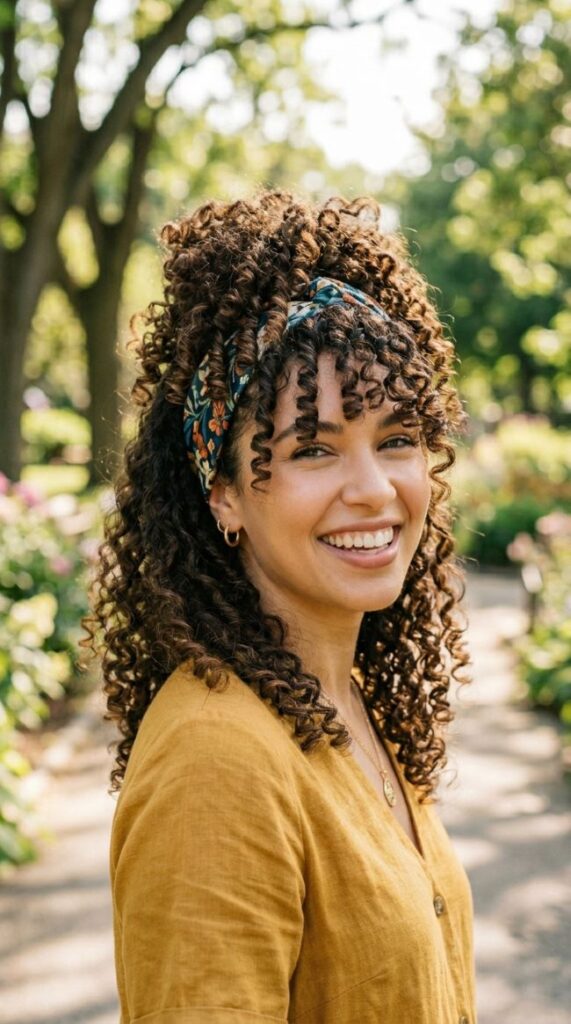
A wide headband can do all the work of gathering your top curls without you needing any pins or elastics. Push a wide fabric or velvet headband back from your forehead to about two inches past your hairline. The curls behind the band will naturally bunch and gather, creating a soft half up effect. Pull a few face-framing pieces forward in front of the band and let them fall toward your cheeks. The key is choosing a wide band at least an inch and a half — so it has enough surface to hold the curls in place without slipping.
Thin headbands tend to slide on curly hair because of the texture. Velvet headbands grip curly hair particularly well and stay in place all day without pins. This style takes about thirty seconds and works on any curl pattern. It’s ideal for gym days, weekend errands, or any day when you want your hair out of your face but don’t want to think about it. Wide headbands in solid colors, prints, and knotted styles are widely available at drugstores and accessory shops for a few dollars.
Conclusion
Half up half down curly styles give you the best of both worlds — your curls are visible, they’re celebrated, and your hair is still off your face and manageable. What makes these styles so worth exploring is that most of them cost next to nothing. A scrunchie, a clip, a ribbon, a few bobby pins — that’s your whole toolkit. You don’t need a blowout, a flat iron, or an hour in front of a mirror. You just need to know what your curls can do and then let them do it. Pick two or three styles from this list that fit your curl pattern and your lifestyle. Try them on a low-stakes day when you have a few minutes to experiment. Once you have the motion down, these styles become second nature — something you can pull off in the car, in a bathroom before a meeting, or at home in the morning without thinking twice. Your curls are already doing the hard work. These styles just give them the right frame.